Easy diy guide: how to build a stud wall
In this comprehensive DIY guide, we'll walk you through the step-by-step process of creating a partition wall at home.
Article Summary
- How to Build a Stud Wall
- Common Mistakes in Building Stud Walls
- Stud Wall Troubleshooting Tips
- FAQs
How to Build a Stud Wall
1. Planning Your Stud Partition
Before you start, carefully plan the purpose, location, and dimensions of your partition. Consider any electrical or plumbing requirements with your wall construction and ensure compliance with local building codes.
2. Gathering Materials and Tools
Compile a list of materials including timber studs, drywall, screws, nails, insulation (if needed), and essential tools such as a saw, drill, and level. Having all materials in advance ensures a smooth workflow.
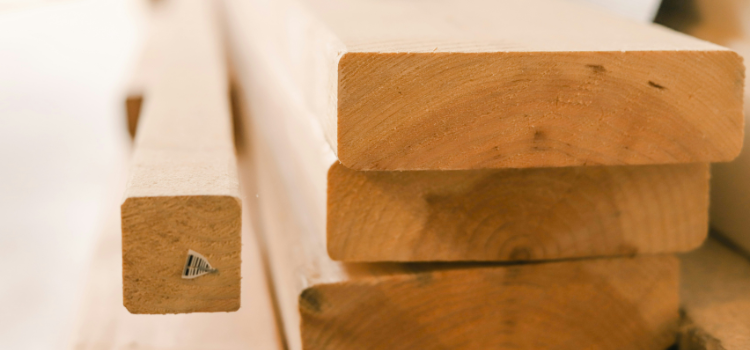
3. Cutting the Timber
Begin by cutting the top and bottom pieces of the drywall framing, followed by the left and right pieces. Cut vertical studs at 600mm intervals and add horizontal studs strategically to create a sturdy framework.
4. Creating Stud Layout
Plan the layout of vertical and horizontal framing studs for maximum strength. Ensure balanced placement of horizontal studs to support the overall integrity of the partition.
5. Installing Noggins for Stability
Enhance the stability of your frame by adding horizontal noggins between the vertical studs. Noggins provide structural support, preventing the wall from bowing or twisting over time.
6. Preparing Drywall
Measure and cut drywall sheets to fit the dimensions of the stud partition. Screw the drywall sheets onto the timber studs, ensuring a secure and even attachment.
7. Finishing Touches - Screw Placement and Drywall Cutting
Place a minimum of 10 screws per drywall sheet, focusing on the perimeter and middle of the studs. Learn the proper technique for cutting drywall to achieve clean breaks and accurate fits.
8. Adding Insulation
Consider incorporating insulation between the studs for soundproofing or thermal benefits. Ensure proper installation to maximise the effectiveness of the insulation.
9. Door and Window Openings
Frame and cut openings for doors or windows if required, ensuring proper support around the openings. Follow precise measurements and cutting techniques for a professional-looking result.
10. Decorating Your Wall
Decide on the final finish, whether it's plastering, wallpaper, or paint. If not plastering, fill in any screw holes for a smooth surface before applying the chosen decoration.
11. Ensuring Structural Integrity
Perform final checks to ensure the wall is level, plumb, and structurally sound. Address any imperfections or gaps before completing the project.
Find tradies near you
Get free quotes from tradies now
By following these detailed steps, you can confidently embark on your DIY journey to create a well-constructed stud partition. This versatile solution not only serves its functional purpose but also adds aesthetic value to your living space. Get ready to enjoy the satisfaction of building a high-quality interior wall with minimal DIY skills!
Common Mistakes in Building Stud Walls
Building stud walls requires precision and attention to detail to ensure structural integrity and stability. However, certain mistakes are commonly made during the construction process. Here are some of the most frequent errors encountered in building interior walls:
-
Improper Stud Spacing: Incorrect spacing between studs can weaken the wall's structure and compromise its ability to support loads or withstand external forces. Studs should typically be spaced at 16 inches on center (OC) for standard framing, or as specified by building codes.
-
Inadequate or Incorrect Fasteners: Failing to use the appropriate fasteners, such as nails or screws, or using insufficient quantities can result in loose or unstable studs. It's essential to follow manufacturer recommendations and building codes for fastener type, size, and spacing.
-
Ignoring Plumbing and Electrical Considerations: Neglecting to plan for plumbing and electrical components within the wall can lead to difficulties during installation and potential damage to these systems. Properly coordinating with electricians and plumbers to accommodate wiring, piping, and outlets is crucial.
-
Insufficient Blocking or Bridging: Neglecting to install blocking or bridging between studs can weaken the wall and cause problems with stability, especially in load-bearing walls. Blocking helps distribute loads evenly and provides additional support for fixtures, such as cabinets or shelves, mounted to the wall.
-
Misaligned or Uneven Studs: Uneven or misaligned studs can cause issues with drywall installation, resulting in visible imperfections or difficulties achieving a smooth finish. Careful measurement and alignment of studs are essential to ensure a level and straight wall surface.
-
Lack of Proper Insulation: Failing to install insulation within stud cavities can compromise energy efficiency and thermal performance. Proper insulation helps regulate indoor temperatures, reduce energy costs, and enhance overall comfort within the building.
Stud Wall Troubleshooting Tips
-
Identify and Rectify Structural Weaknesses: If the wall feels unstable or exhibits signs of sagging or bowing, inspect for improperly installed or damaged studs, and reinforce as necessary with additional fasteners or blocking.
-
Address Drywall Installation Issues: If drywall installation reveals uneven or misaligned studs, consider adjusting or shimming studs as needed to achieve a level surface. Use drywall joint compound or filler to correct minor imperfections before finishing.
-
Correct Electrical and Plumbing Interference: If encountering difficulties due to electrical or plumbing components within the wall, consult with professionals to reroute or reconfigure systems as needed. Ensure proper clearance and accessibility for future maintenance.
-
Enhance Insulation: If experiencing inadequate insulation, assess the existing insulation material and consider adding supplementary insulation or upgrading to a higher R-value material to improve energy efficiency and comfort.
-
Consult Building Codes and Standards: When troubleshooting structural or construction issues, refer to local building codes and industry standards for guidance on proper construction practices and requirements.
Find tradies near youGet free quotes from tradies now
Need some advice or assistance from an expert? Get in touch with local builders today!
Get free quotes in minutes.
Get quotes from our qualified and licensed tradies Australia-wide.
FAQs
1. What are some design considerations for load-bearing stud walls?
- Calculate load requirements based on building usage and anticipated loads.
- Choose high-quality timber or engineered wood products.
- Space and size studs appropriately, typically 16 inches on center.
- Provide adequate support with headers, beams, or columns.
- Use proper sheathing materials for lateral support and rigidity.
- Plan for door and window openings with reinforced framing.
- Coordinate with other structural elements for compatibility.
- Install insulation for thermal efficiency and soundproofing.
- Account for building movement and settlement over time.
- Ensure compliance with local building codes and regulations.
2. What are some soundproofing solutions for stud walls?
-
Double Stud Walls: Constructing double stud walls involves building two separate walls with an air gap in between. This air gap acts as a sound buffer, reducing the transmission of sound vibrations.
-
Insulation: Installing high-density insulation within the stud cavities can absorb sound waves and minimise sound transmission through the walls. Fiberglass or mineral wool insulation with high STC (Sound Transmission Class) ratings are commonly used for this purpose.
-
Resilient Channels: Resilient channels are metal strips attached to the studs horizontally, onto which the drywall is then screwed. This decouples the drywall from the studs, reducing the transfer of sound vibrations through the wall.
-
Soundproof Drywall: Specialised soundproof drywall, such as gypsum board with added mass or viscoelastic polymers, can be used to replace standard drywall.
-
Mass-Loaded Vinyl (MLV): Mass-loaded vinyl sheets can be installed between the studs and the drywall to add mass and density to the wall assembly, effectively blocking sound transmission.
-
Acoustic Sealant: Applying acoustic sealant to the gaps and joints between studs, drywall panels, and around electrical outlets can help reduce air leakage and prevent sound leaks.
-
Damping Compound: Adding damping compound between layers of drywall can help dissipate sound energy and reduce vibrations, enhancing soundproofing performance.
-
Decoupling Techniques: Employing decoupling techniques such as staggered stud walls or using resilient sound isolation clips can break the direct structural connection between the layers of the wall, reducing sound transmission.
-
Mass and Absorption Layers: Combining materials with different properties, such as adding a layer of mass-loaded vinyl followed by insulation and drywall, can create a more effective soundproofing barrier.
-
Acoustic Panels or Fabrics: Installing acoustic panels or fabric-covered panels on the walls can absorb sound reflections and improve overall sound quality within the room.
3. What are some cost-effective alternatives to traditional stud walls?
- Metal Framing: Lightweight, durable, and resistant to moisture and pests.
- Structural Insulated Panels (SIPs): Excellent insulation and structural support, reducing material needs.
- Engineered Wood Products: Strength and stability with less waste and fewer knots than traditional timber.
- Prefabricated Wall Panels: Customisable, faster installation, and reduced labour costs.
- Insulated Concrete Forms (ICFs): Energy-efficient and durable, reducing long-term costs.
- Straw Bale Construction: Inexpensive, renewable, and offers excellent insulation properties.
- Rammed Earth Walls: Sustainable, thermal mass properties, and locally sourced materials.
- Recycled or Salvaged Materials: Cost-effective options adding uniqueness and character to the project.
Further Reading
- 5 easy ways to upgrade your home
- Do I Need a Carpenter for My Home Extension?
- Doing a Kitchen Renovation on a Budget
Find tradies near you
Get free quotes from tradies now
What are some design considerations for load-bearing stud walls?
Calculate load requirements based on building usage and anticipated loads. Choose high-quality timber or engineered wood products. Space and size studs appropriately, typically 16 inches on center. Provide adequate support with headers, beams, or columns. Use proper sheathing materials for lateral support and rigidity. Plan for door and window openings with reinforced framing. Coordinate with other structural elements for compatibility. Install insulation for thermal efficiency and soundproofing. Account for building movement and settlement over time. Ensure compliance with local building codes and regulations.
What are some soundproofing solutions for stud walls?
Double Stud Walls: Constructing double stud walls involves building two separate walls with an air gap in between. This air gap acts as a sound buffer, reducing the transmission of sound vibrations. Insulation: Installing high-density insulation within the stud cavities can absorb sound waves and minimize sound transmission through the walls. Fiberglass or mineral wool insulation with high STC (Sound Transmission Class) ratings are commonly used for this purpose. Resilient Channels: Resilient channels are metal strips attached to the studs horizontally, onto which the drywall is then screwed. This decouples the drywall from the studs, reducing the transfer of sound vibrations through the wall. Soundproof Drywall: Specialized soundproof drywall, such as gypsum board with added mass or viscoelastic polymers, can be used to replace standard drywall. Mass-Loaded Vinyl (MLV): Mass-loaded vinyl sheets can be installed between the studs and the drywall to add mass and density to the wall assembly, effectively blocking sound transmission. Acoustic Sealant: Applying acoustic sealant to the gaps and joints between studs, drywall panels, and around electrical outlets can help reduce air leakage and prevent sound leaks. Damping Compound: Adding damping compound between layers of drywall can help dissipate sound energy and reduce vibrations, enhancing soundproofing performance. Decoupling Techniques: Employing decoupling techniques such as staggered stud walls or using resilient sound isolation clips can break the direct structural connection between the layers of the wall, reducing sound transmission. Mass and Absorption Layers: Combining materials with different properties, such as adding a layer of mass-loaded vinyl followed by insulation and drywall, can create a more effective soundproofing barrier. Acoustic Panels or Fabrics: Installing acoustic panels or fabric-covered panels on the walls can absorb sound reflections and improve overall sound quality within the room.
What are some cost-effective alternatives to traditional stud walls?
Metal Framing: Lightweight, durable, and resistant to moisture and pests. Structural Insulated Panels (SIPs): Excellent insulation and structural support, reducing material needs. Engineered Wood Products: Strength and stability with less waste and fewer knots than traditional timber. Prefabricated Wall Panels: Customizable, faster installation, and reduced labor costs. Insulated Concrete Forms (ICFs): Energy-efficient and durable, reducing long-term costs. Straw Bale Construction: Inexpensive, renewable, and offers excellent insulation properties. Rammed Earth Walls: Sustainable, thermal mass properties, and locally sourced materials. Recycled or Salvaged Materials: Cost-effective options adding uniqueness and character to the project.